The complete step-by-step guide to using Eye Precision
For the step-by-step guide for EP Animations, go to this module
For installation instructions go to this page and choose your operating system
Open Eye Precision
On Windows the program should be found in your Start Menu, on Mac it should be in your Applications folder and/or your Launchpad
I recommend pinning the menu icon to the taskbar to allow quick access to the program
Check for Updates
Eye Precision receives regular updates. Make sure you're using the latest version by clicking on "Help" in the menu bar (at the top of the screen on Mac, at the top of the program window in Windows) and choosing "Check for Updates"

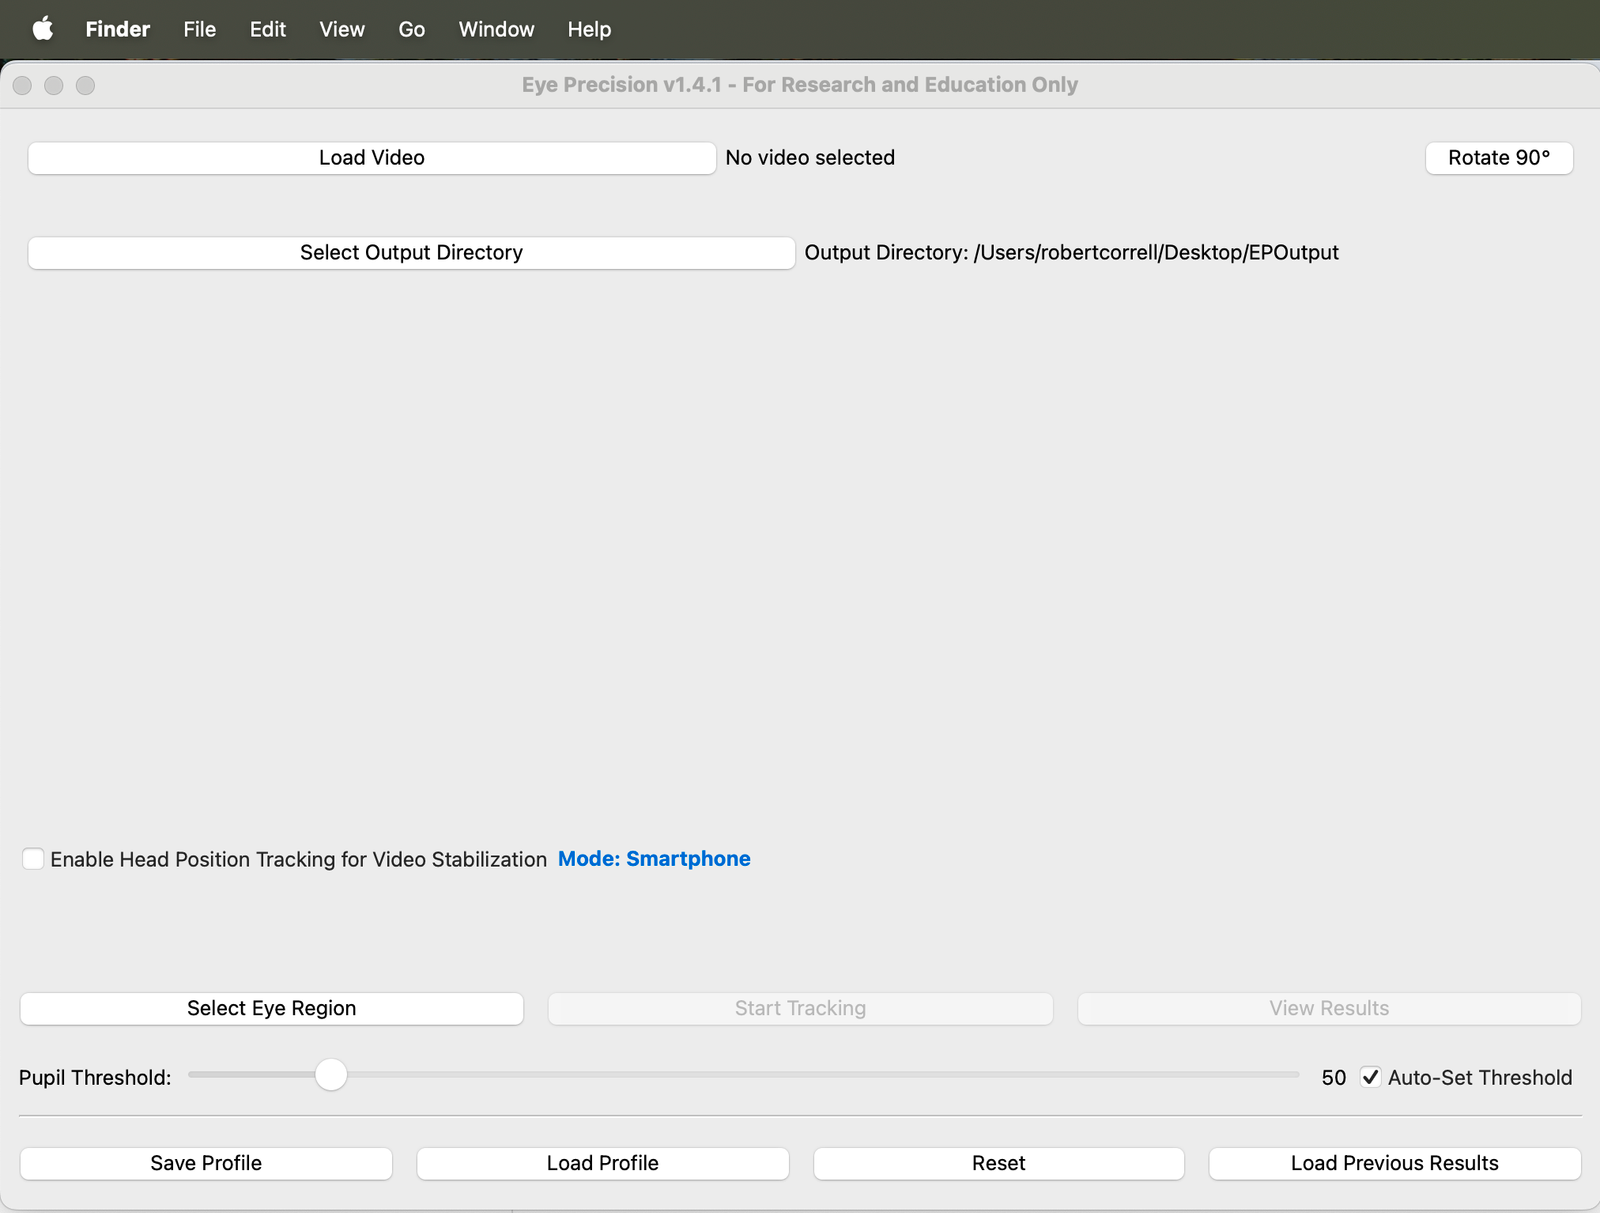
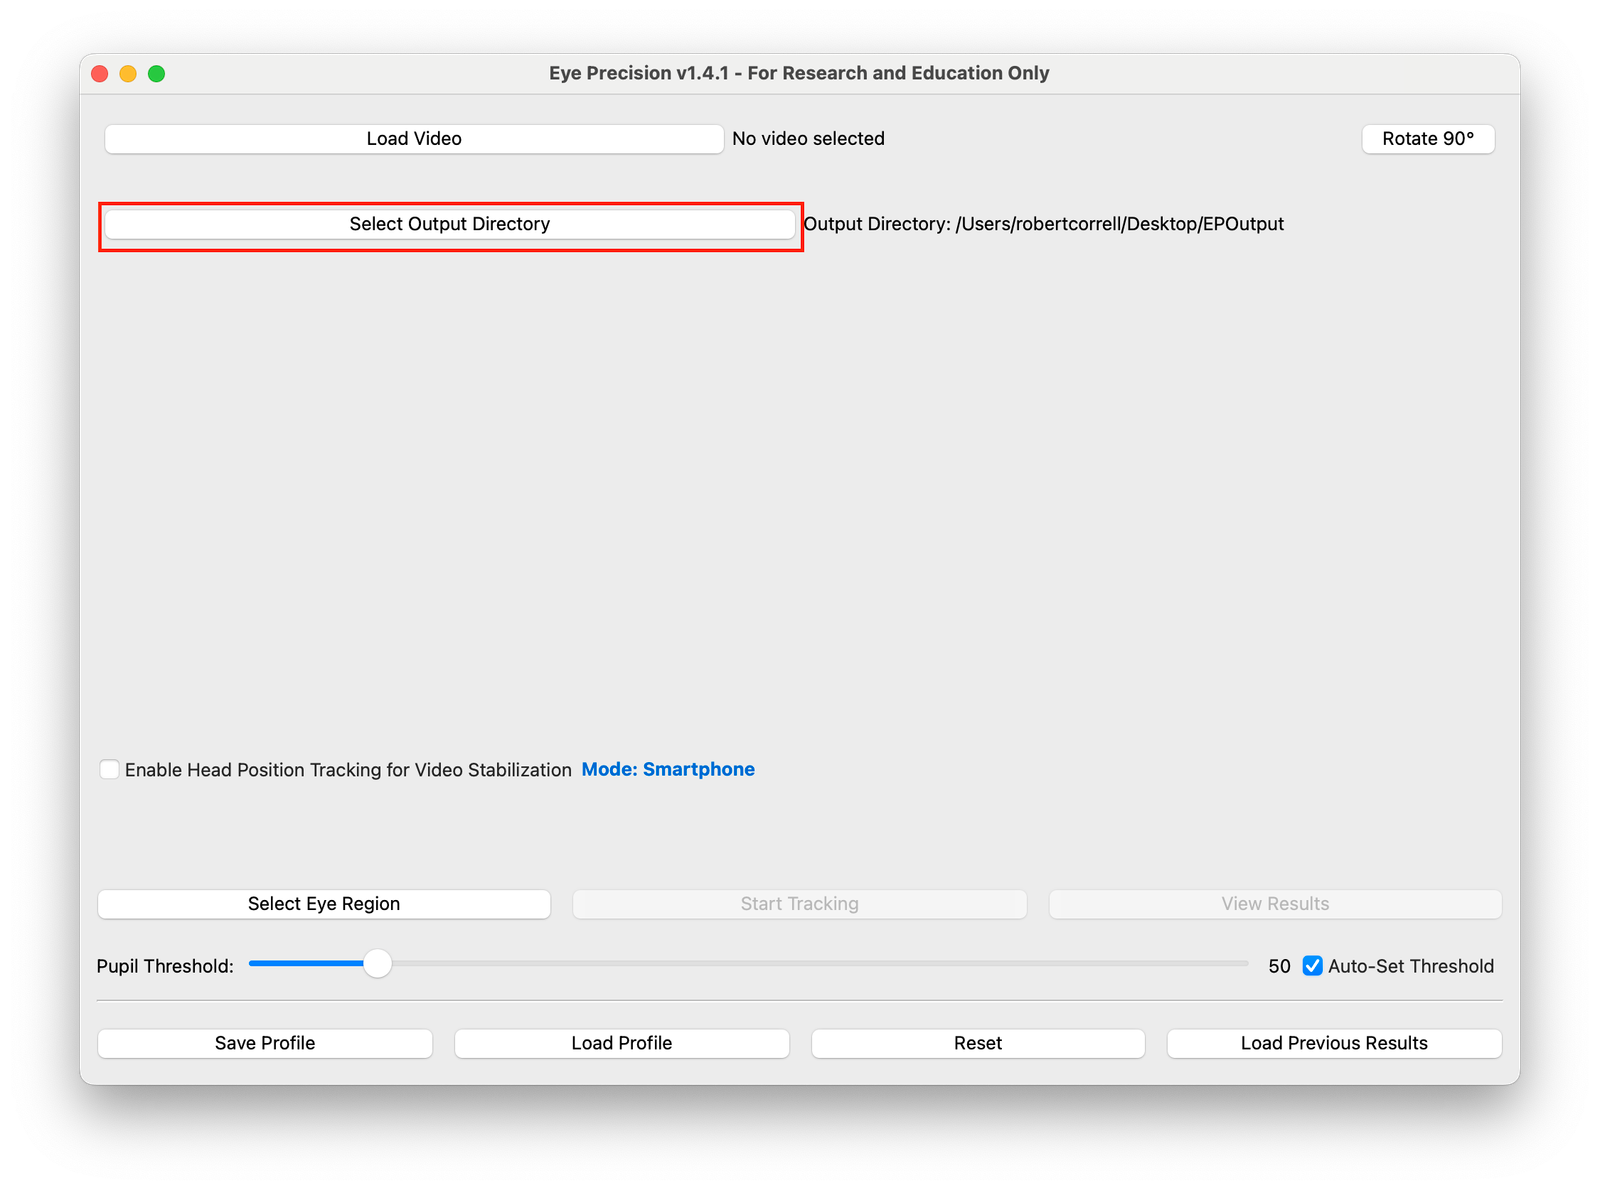
Choose where to save results
The first time that you use Eye Precision you must choose where the results files will be saved. This can be any writable location on your computer. I recommend creating a directory in an easily-accessible location, such as your desktop or documents folder
If you wish you can create a new directory for each test or test subject
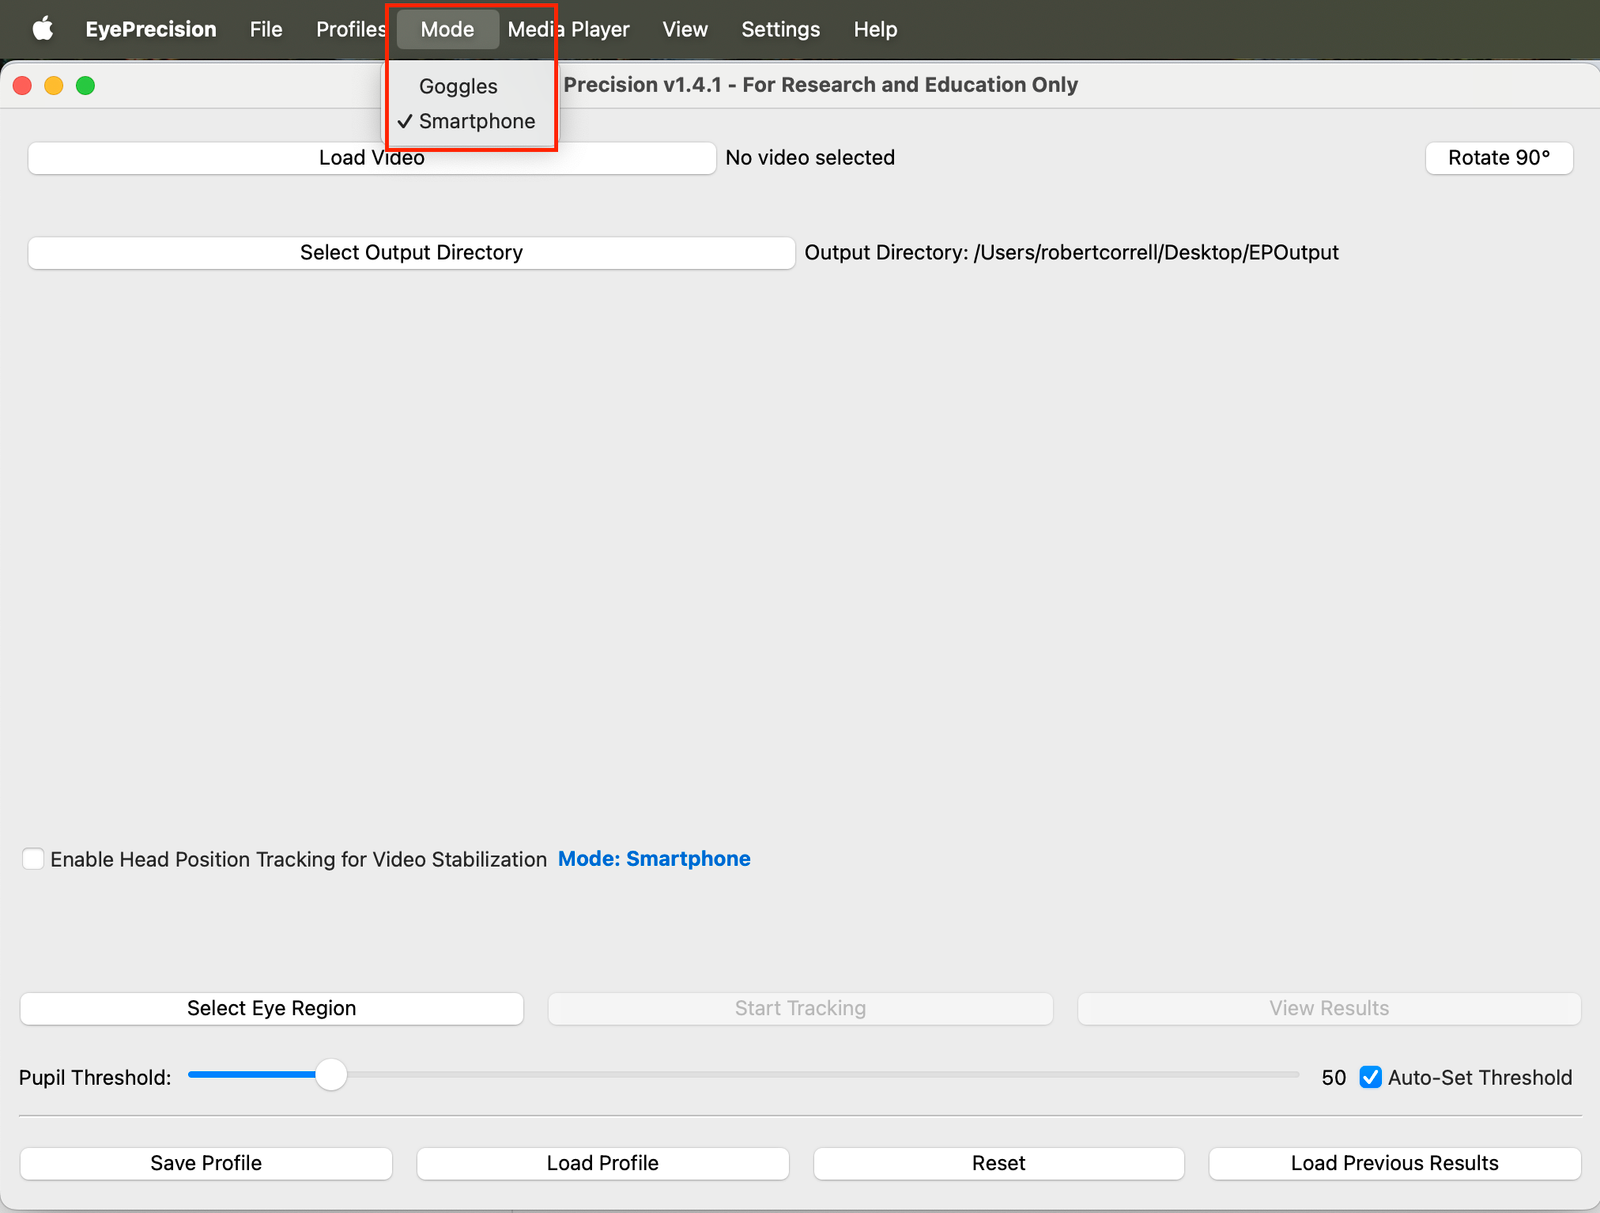
Choose Eye Precision mode (v1.4+)
Modes have been added to Eye Precision. This provides different defaults for different types of videos
Choose the mode related to how your video was recorded
Load your video
Eye Precision analyses existing videos. These may have been recorded directly onto your computer, for example using OBS studio, or externally and then uploaded to your computer
To load your video you can either click on the load video button at the top of the window, or drag-and-drop the file from your computer onto the Eye Precision window
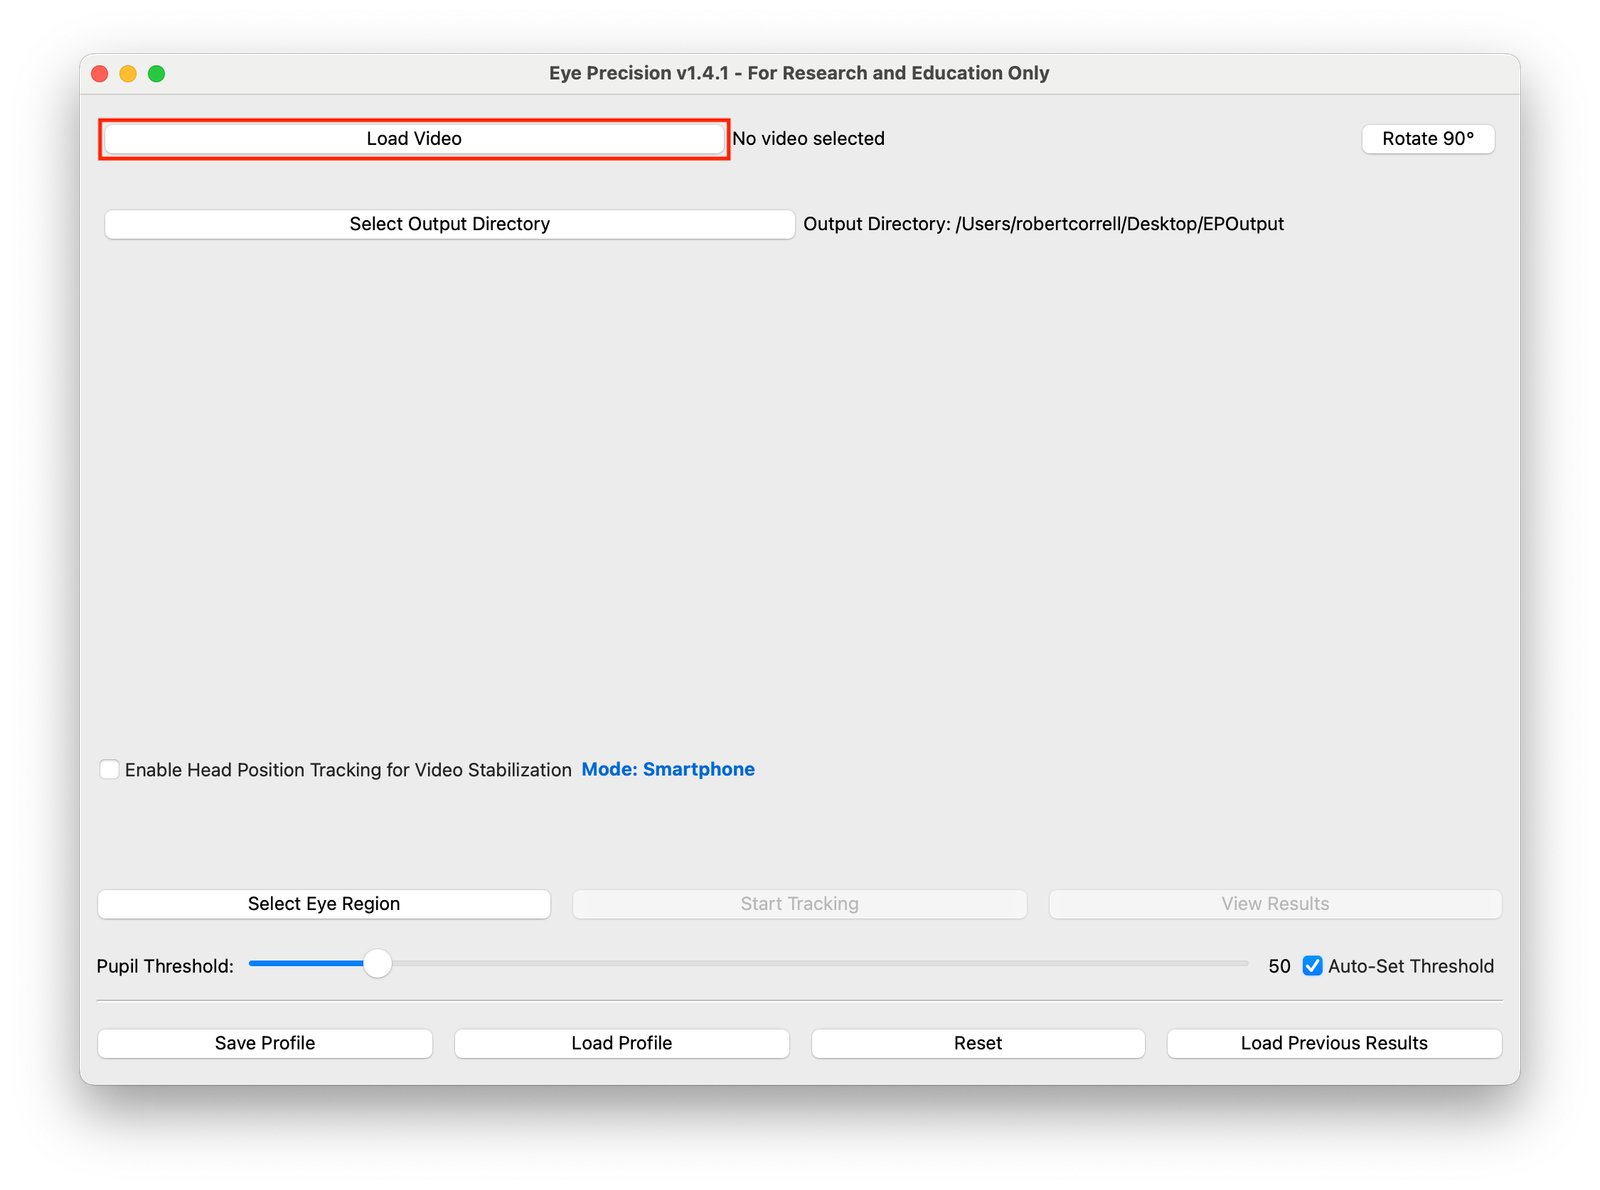
The first frame of the video will appear in the Eye Precision screen
Set Test Subject Identifier (v1.4.3 or later)
You can optionally set a name/number for the test or the test subject
This identifier will be added to the folder name for the saved files, making it easier to find the test again when viewing results
If the identifier is left empty the folder name will simply be "tracking_" followed by the time and date of the test
Set Start/End times
In some cases you may want to remove the start and/or end of your video, or analyse only part of the video
Selecting a different frame as the first frame to start with a clearer pupil can also give better results
Adjust the sliders to choose the start/end times
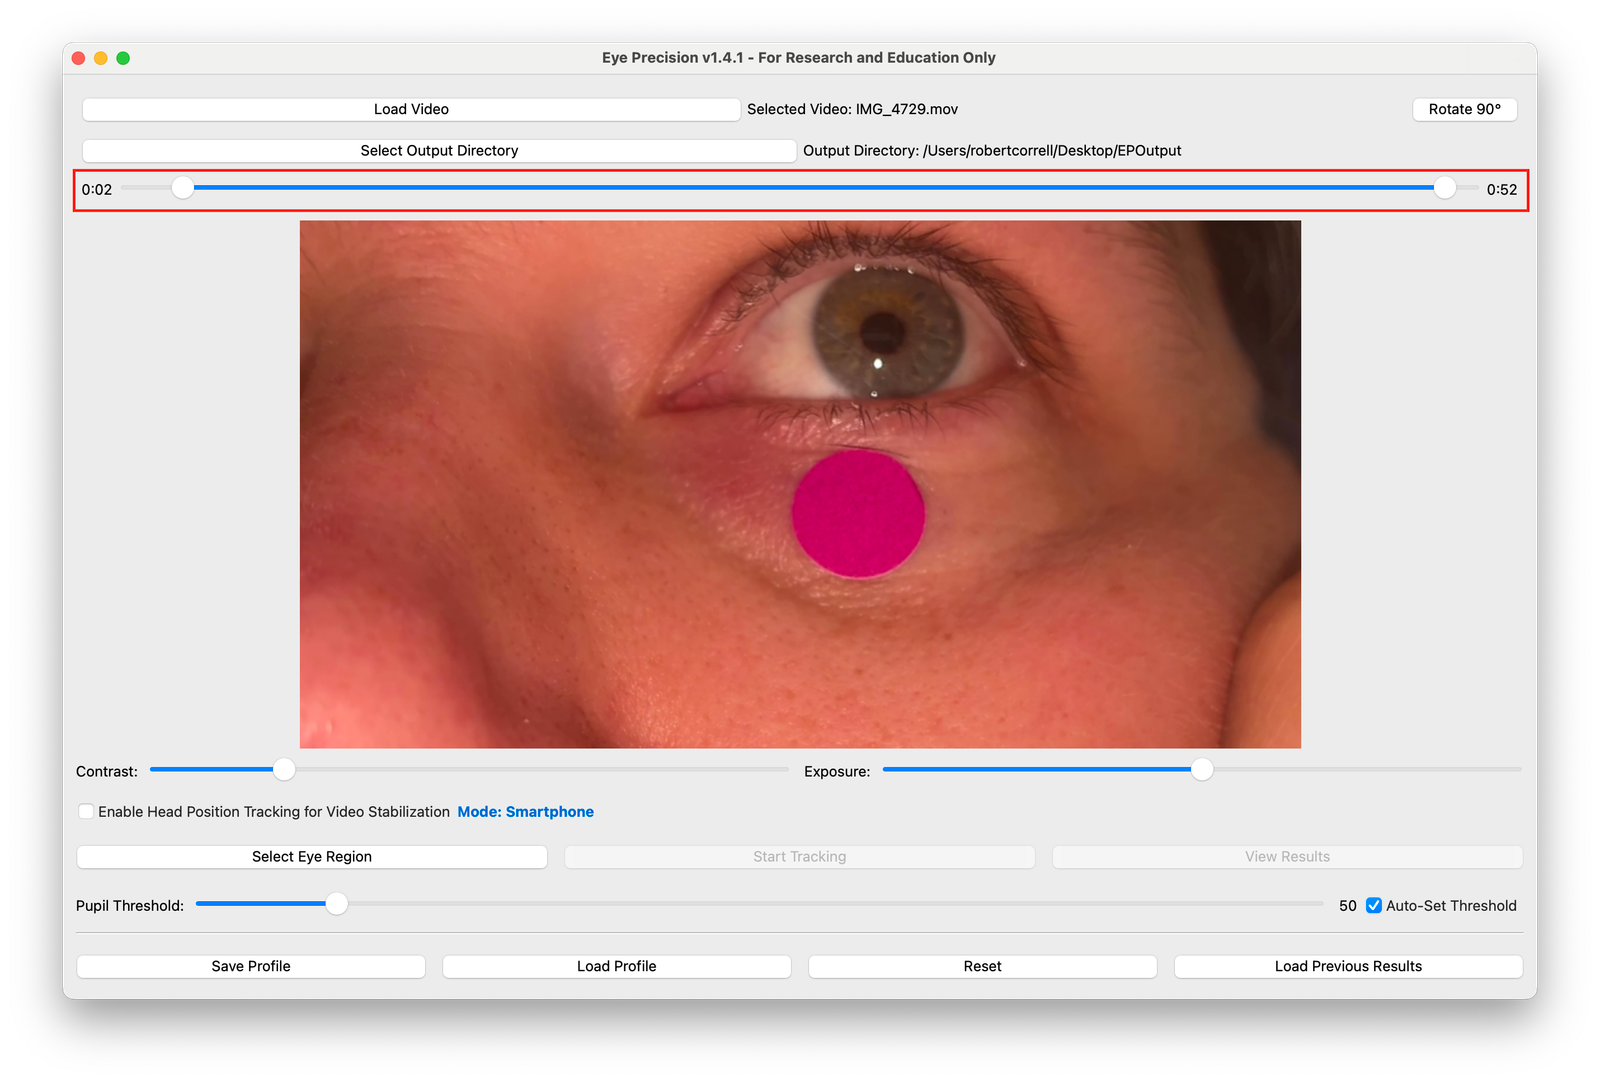
When using a video including a calibration from EP Animations, make sure you start the video around the leftward pursuit that starts the cailbration for best results
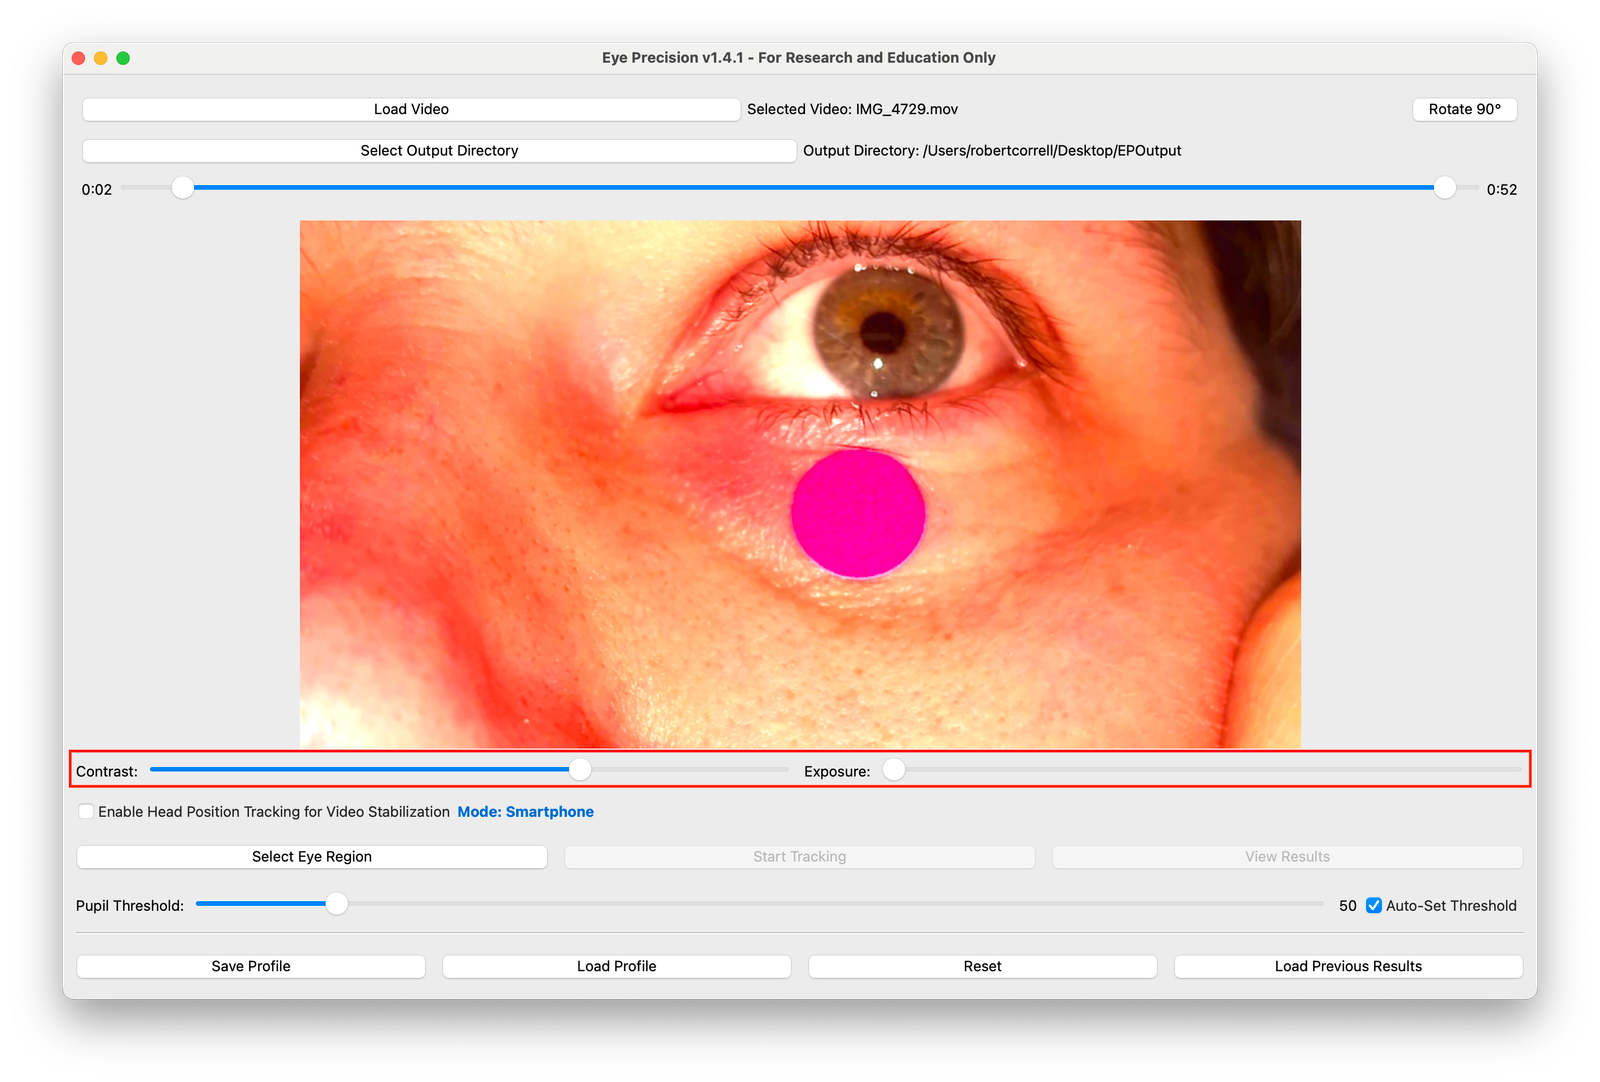
Contrast/Exposure/Hue
Eye Precision uses visual information from the video to track the pupil. Results are therefore best when the pupil is most clearly differentiated from the surrounding area
By adjusting the contrast and exposure sliders you can optimise video analysis
When using goggles, its is almost always optimal to use maximum constrast and minimum exposure
When using a smartphone the video quality and eye colour can change the optimal settings. It can be useful to run an analysis of a few seconds of video first, and adjust the settings if necessary before analysing the entire video
Often a very dark pupil provides the best results, while with darker eye colours a high contrast and mid-level exposure, lightening the iris, can be optimal
Since 1.4.3 Smartphone users can adjust the hue to increase the difference between the pupil and the iris. For some eye colours this can improve detection
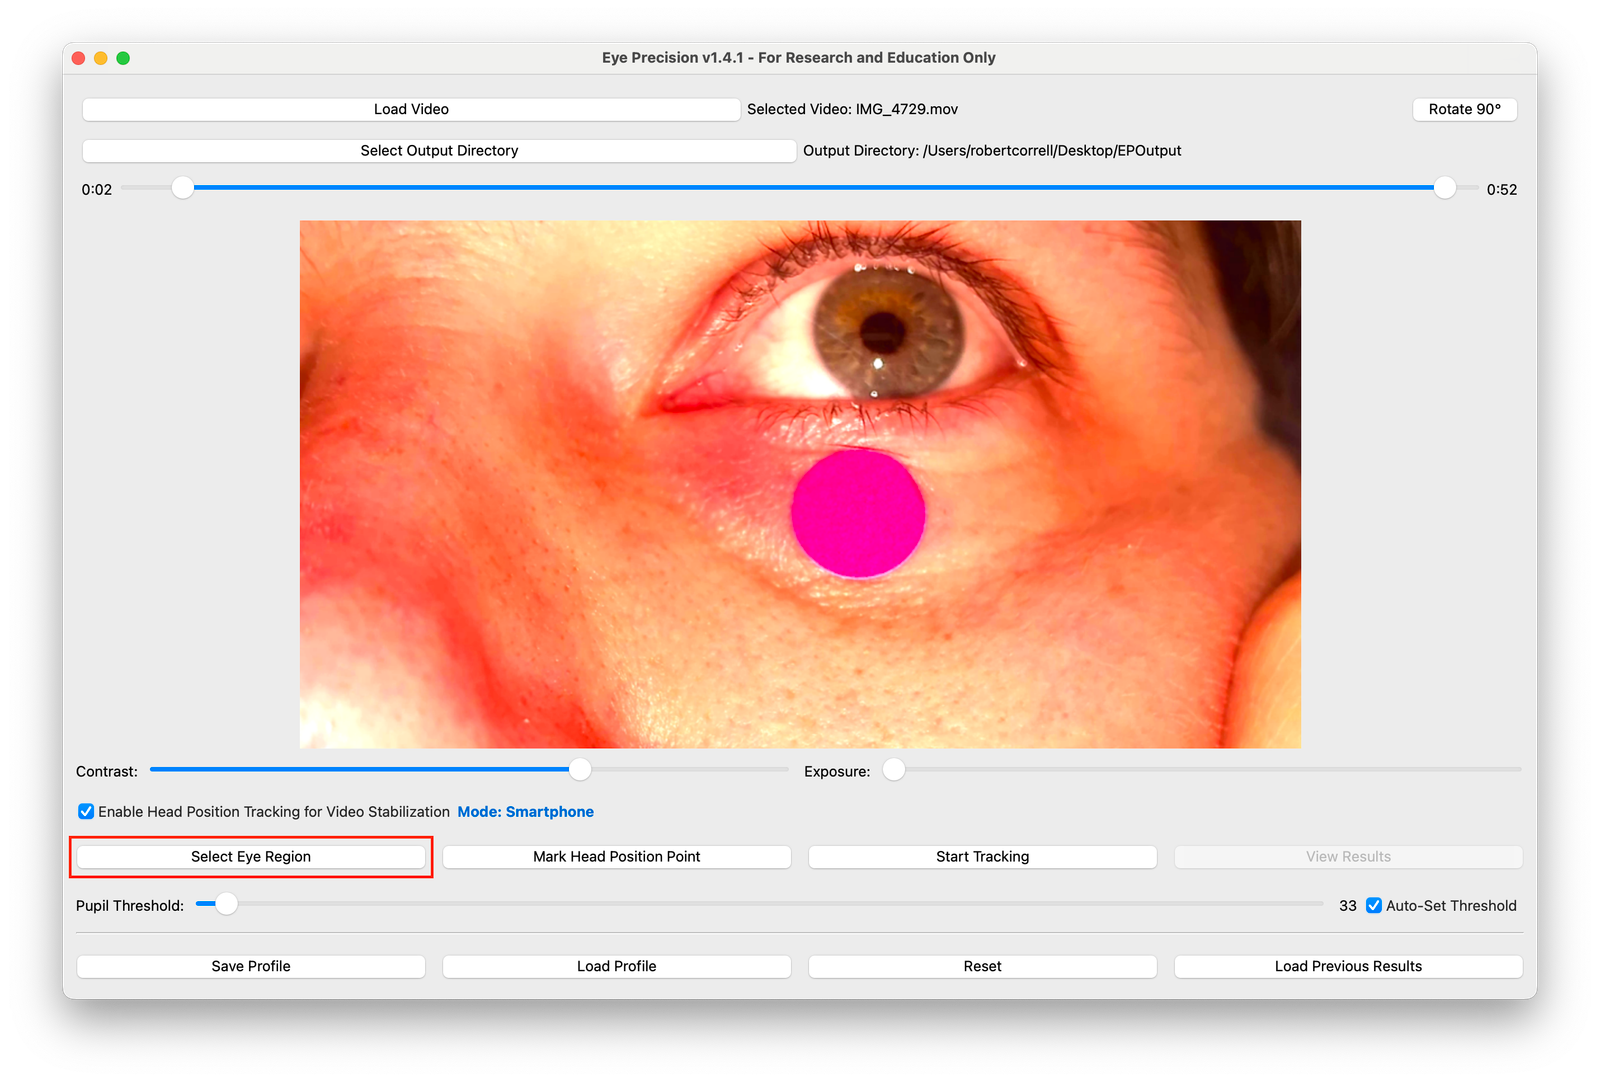
Selecting the Eye Region
After setting the lighting levels, it is time to mark where the eye will be tracked within the video
Any part of the video frame outside of the marked area will not be analysed to search for a pupil, so if the centre of the pupil leaves the marked Eye Region, it will not be tracked
While tracking across the entire video frame is feasible, it increases the chances of artifacts and can greatly increase video processing time
Ideally the Eye Area (ROI) marking should be as small as possible, while still covering the entire area in which the pupil may be found
When analysing videos recorded on a non-head-mounted camera, the eye can move within the frame, so it may be necessary to mark a larger area
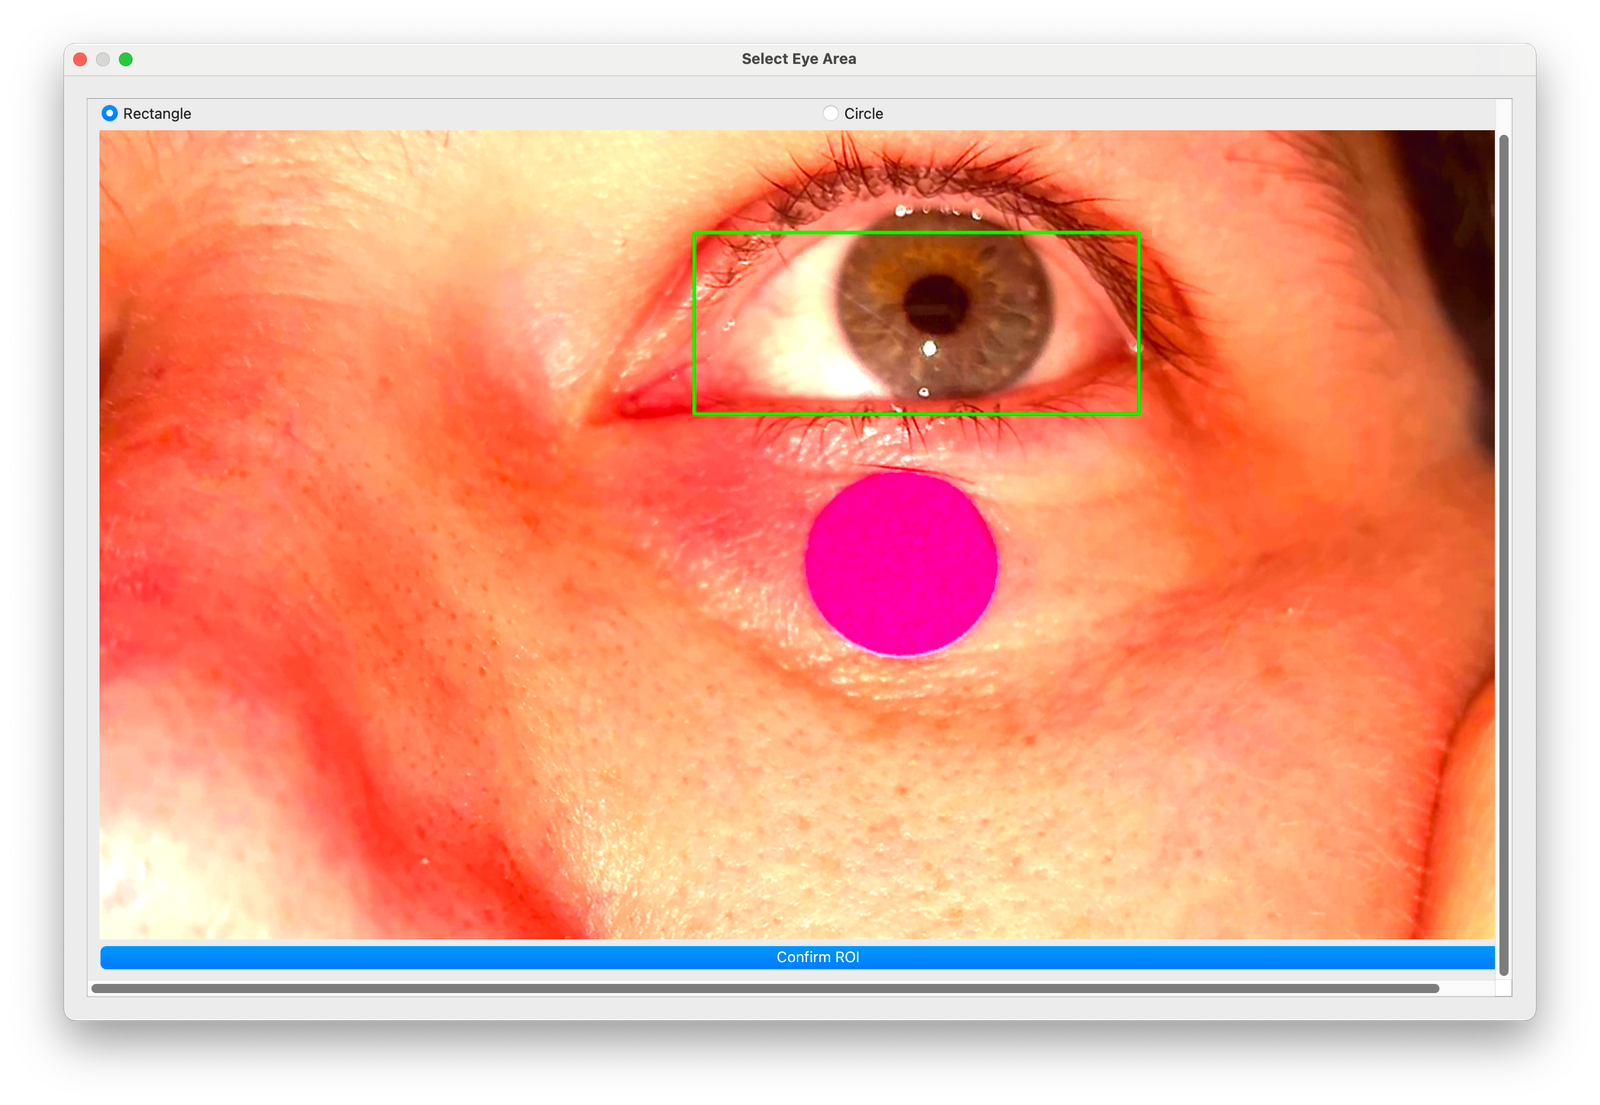
By default the marked Eye Area is displayed in results video. If you see that the pupil leaves this area, it may be necessary to rerun the video analysis
Once you're happy with the marked eye area, click "Confirm ROI" at the bottom of the window (depending on the video size this may require scrolling downwards)
Marking the pupil
Eye Precision requires an initial pupil to follow. Its expected position, size and darkness are based on this initial pupil
By default the program will attempt to find a pupil within the marked Eye Area
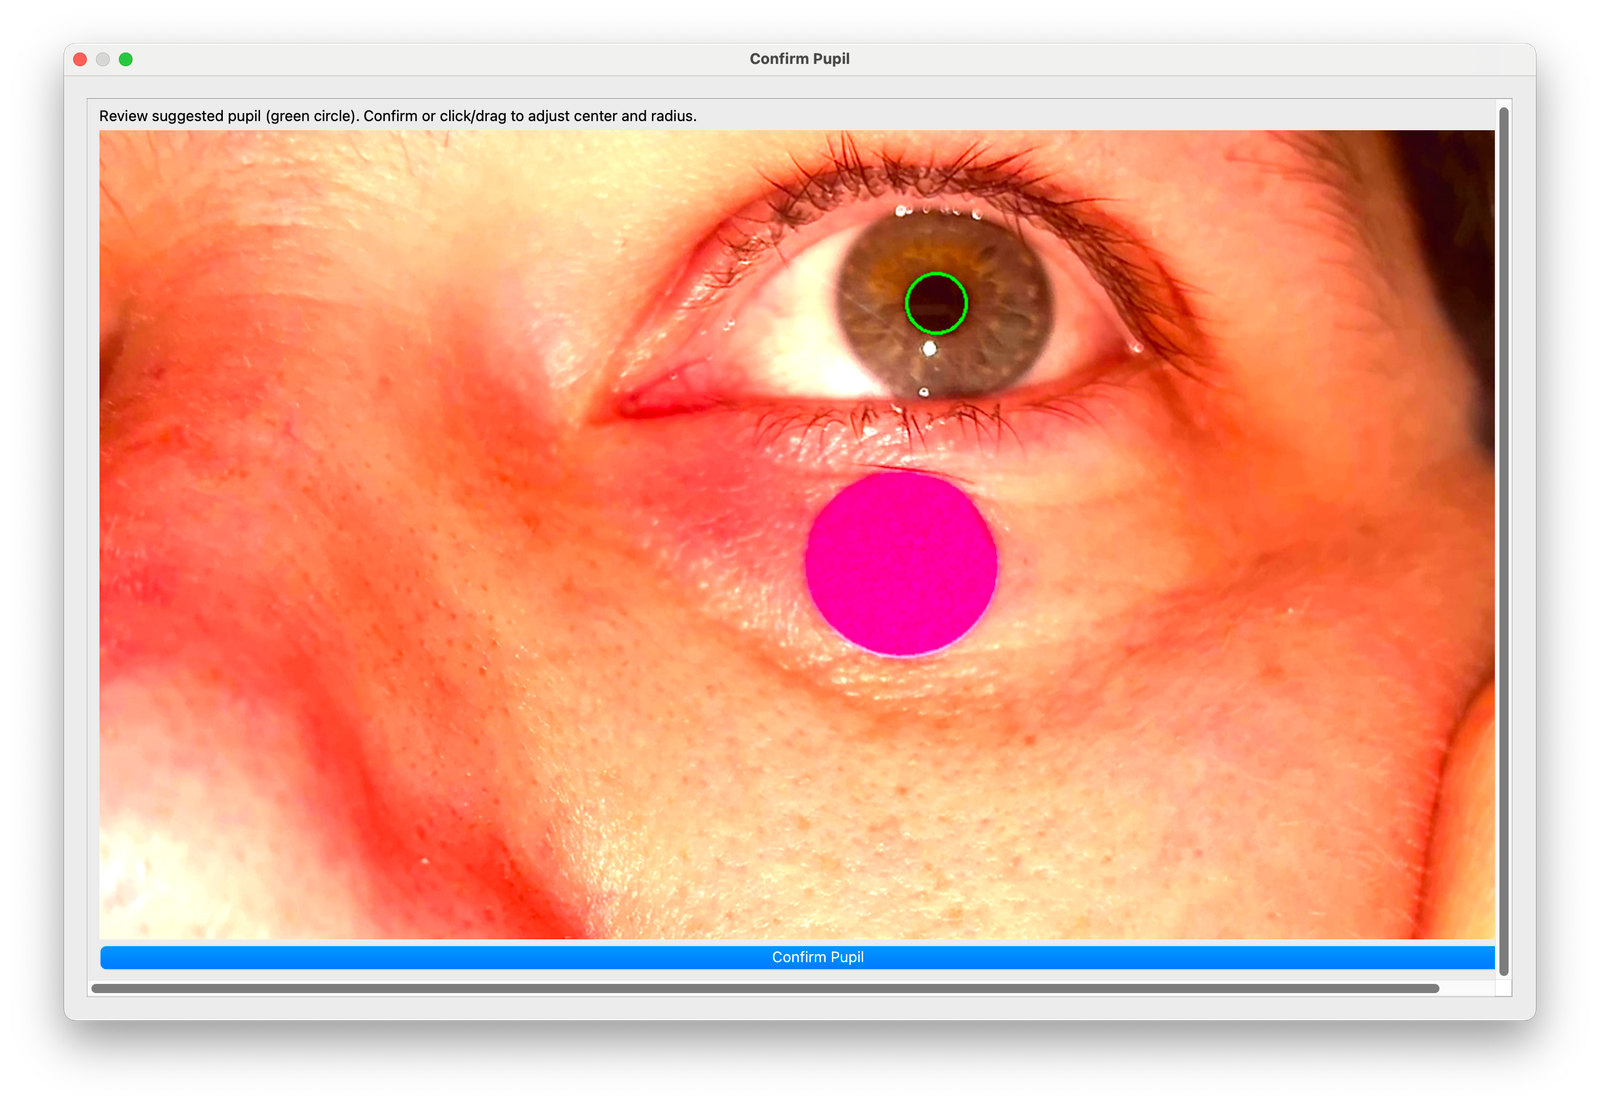
If the indicated area does match the expected pupil, you can manually mark it yourself. Do this by clicking on the centre of the pupil, and dragging the mouse cursor to the edge of the pupil. Ideally this should match the contours of the pupil as closely as possible
Once you're happy with the marked pupil, click "Confirm Pupil" at the bottom of the window (depending on the video size this may require scrolling downwards)
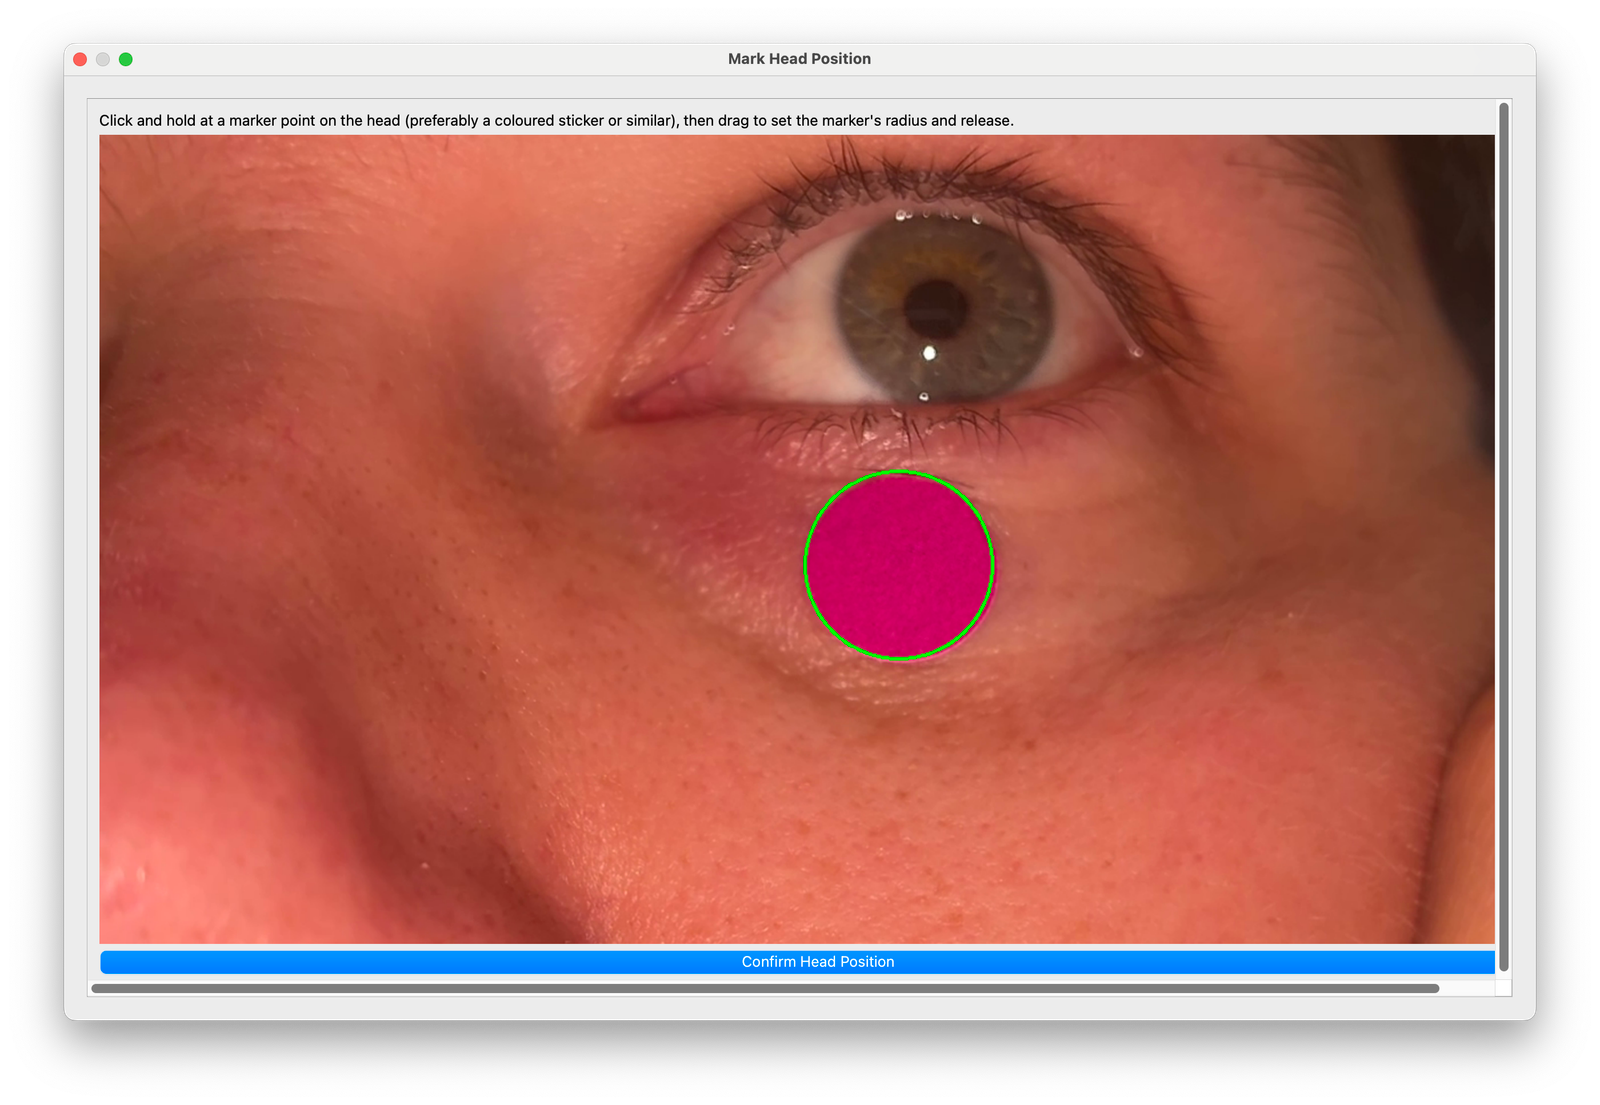
Head Movement Correction
Videos recorded on a smartphone are inherently suseptible to head movement. When recording with goggles, the head may move relevant to the target, but the camera position is fixed relative to the eye. This is not (necessarily) the case with other cameras
Eye Precision has a Head Movement Correction system for using when in Smartphone Mode
This requires marking a fixed point in the video that can be tracked to estimate head movement. This point should be something that remains visible throughout the video, and is as close to the eye as possible
Mark this point by clicking on the "Mark Head Position Point" button while Head Movement Position Tracking is enabled

Mark the head position point by clicking on the centre of the marked and dragging to the edge. Try to include only the coloured marked, and nothing outside of it. Circular markers with bright colours work best
Once you're happy with the marked tracking point, click "Confirm" at the bottom of the window (depending on the video size this may require scrolling downwards)
Pupil threshold
The pupil threshold is the maximum brightness of an area of the video that can be considered as a possible pupil in the analysis
In practice, this prevents other areas of skin/background etc from being considered as a pupil, and reduces artifacts
Eye Precision sets the pupil threshold automatically based on the pupil that has been marked in the "Marking the Pupil" step
In the majority of cases you do not need to change this setting

If the analysis fails to track the pupil accurately, it can be useful to adjust this manually
When the video is finding other lighter areas of the video as possible pupils, try adjusting the pupil threshold downwards
If the video is failing to find a pupil at all at times, try adjusting the threshold upwards
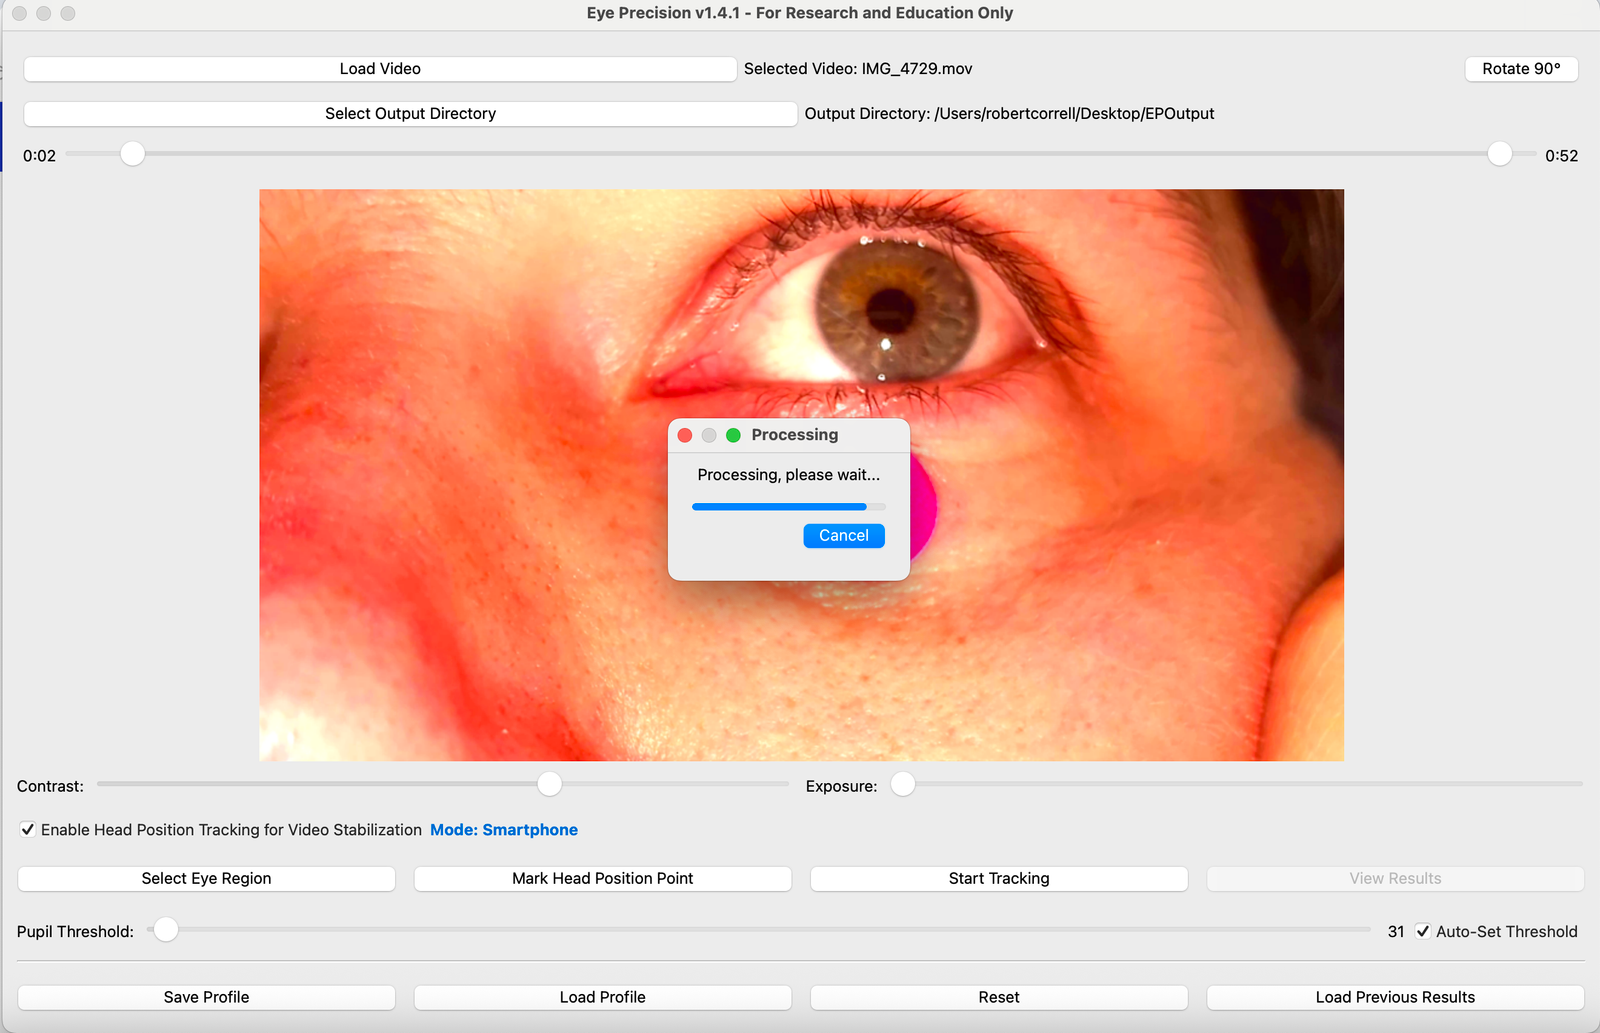
Run the Analysis
Once all steps have been completed, the "Start Tracking" button should be available
Processing times depend on the length of the video, the frame rate and the speed of your computer. For longer videos a progress bar will show how far the analysis has got
Viewing Results
After processing is finished you can click on the "View Results" button. This will open the results view, including the tracking video and the results graphs

The play controls and slider allow you to view the results video and scroll through it
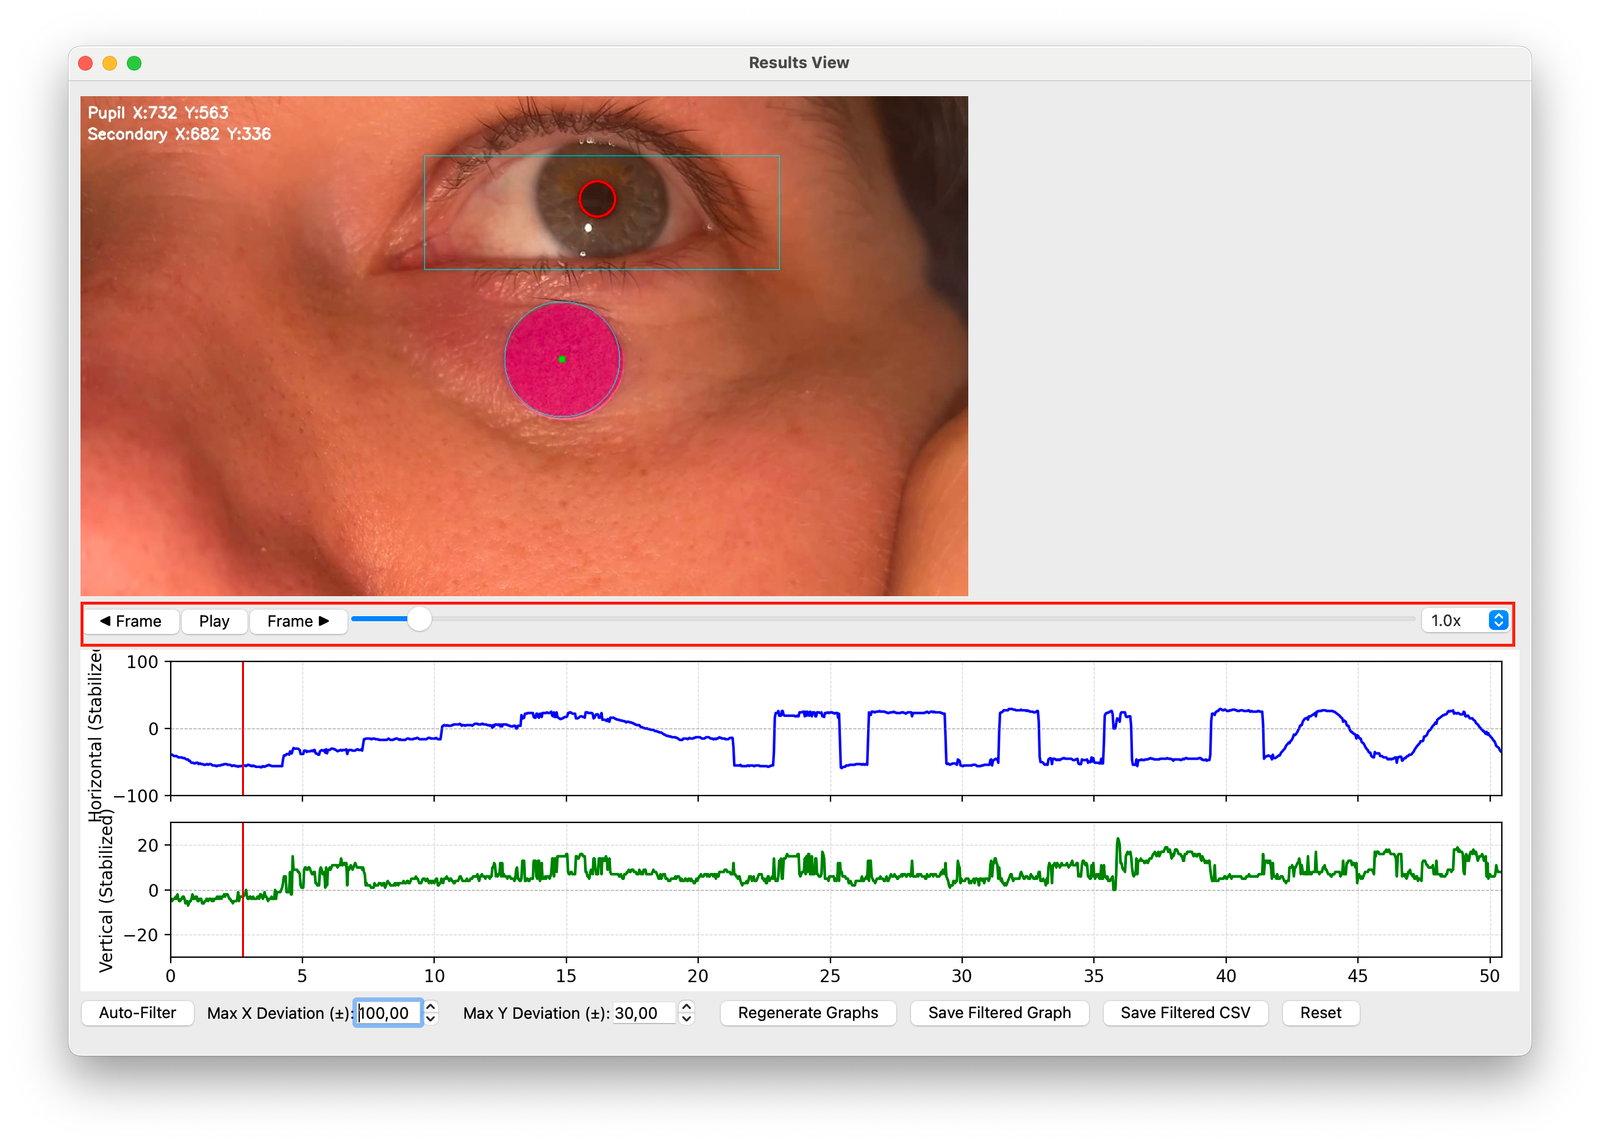
The top results graph shows horizontal eye movement vs time

The bottom results graph shows vertical eye movement vs time
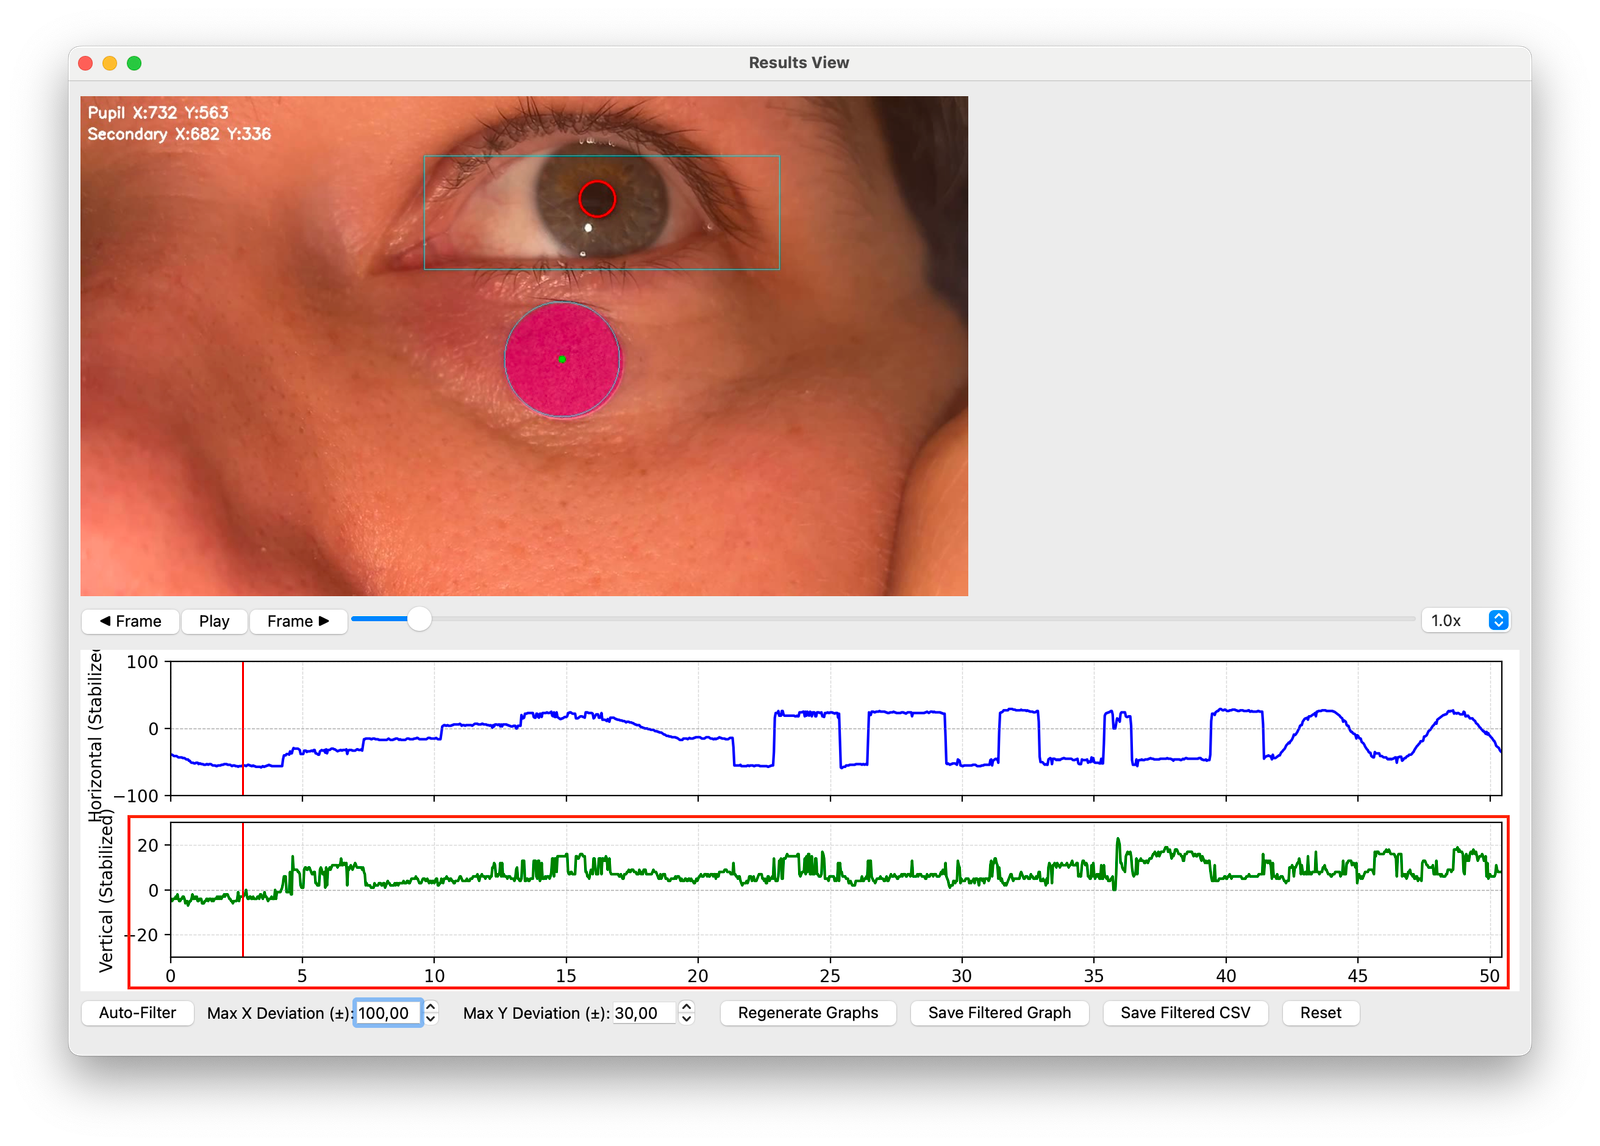
Explanations of the graphs can be found in this module, and help with interpreting the graphs can be found here
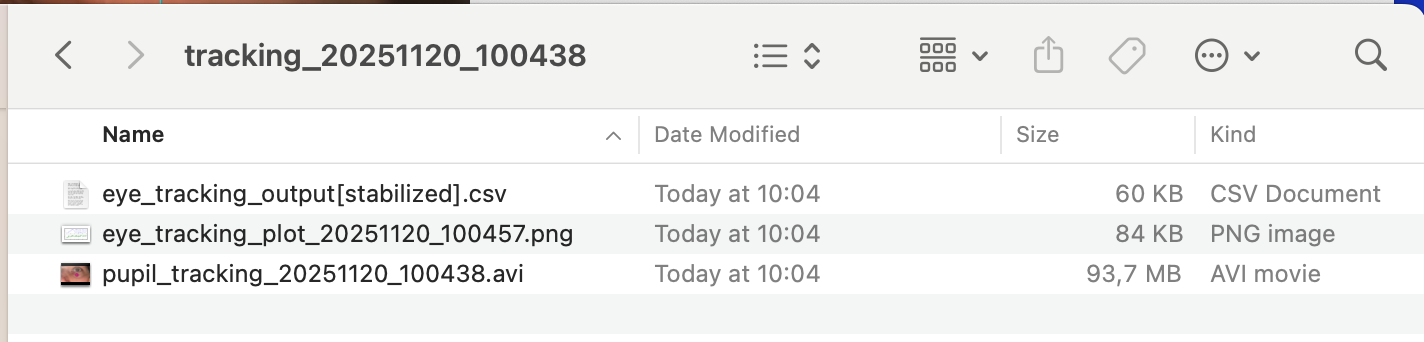
Accessing results
The results files, including the video, the raw data and the graphs, are saved to the output directory you selected
Opening Results in EP Animations
From Eye Precision v1.4.4 and EP Animations v1.1.9, you can automatically open the results file in EP Animations by clicking the "Analyse in EP Animations" button at the bottom right of the results screen. This button is only visible if EP Animations is installed on you computer
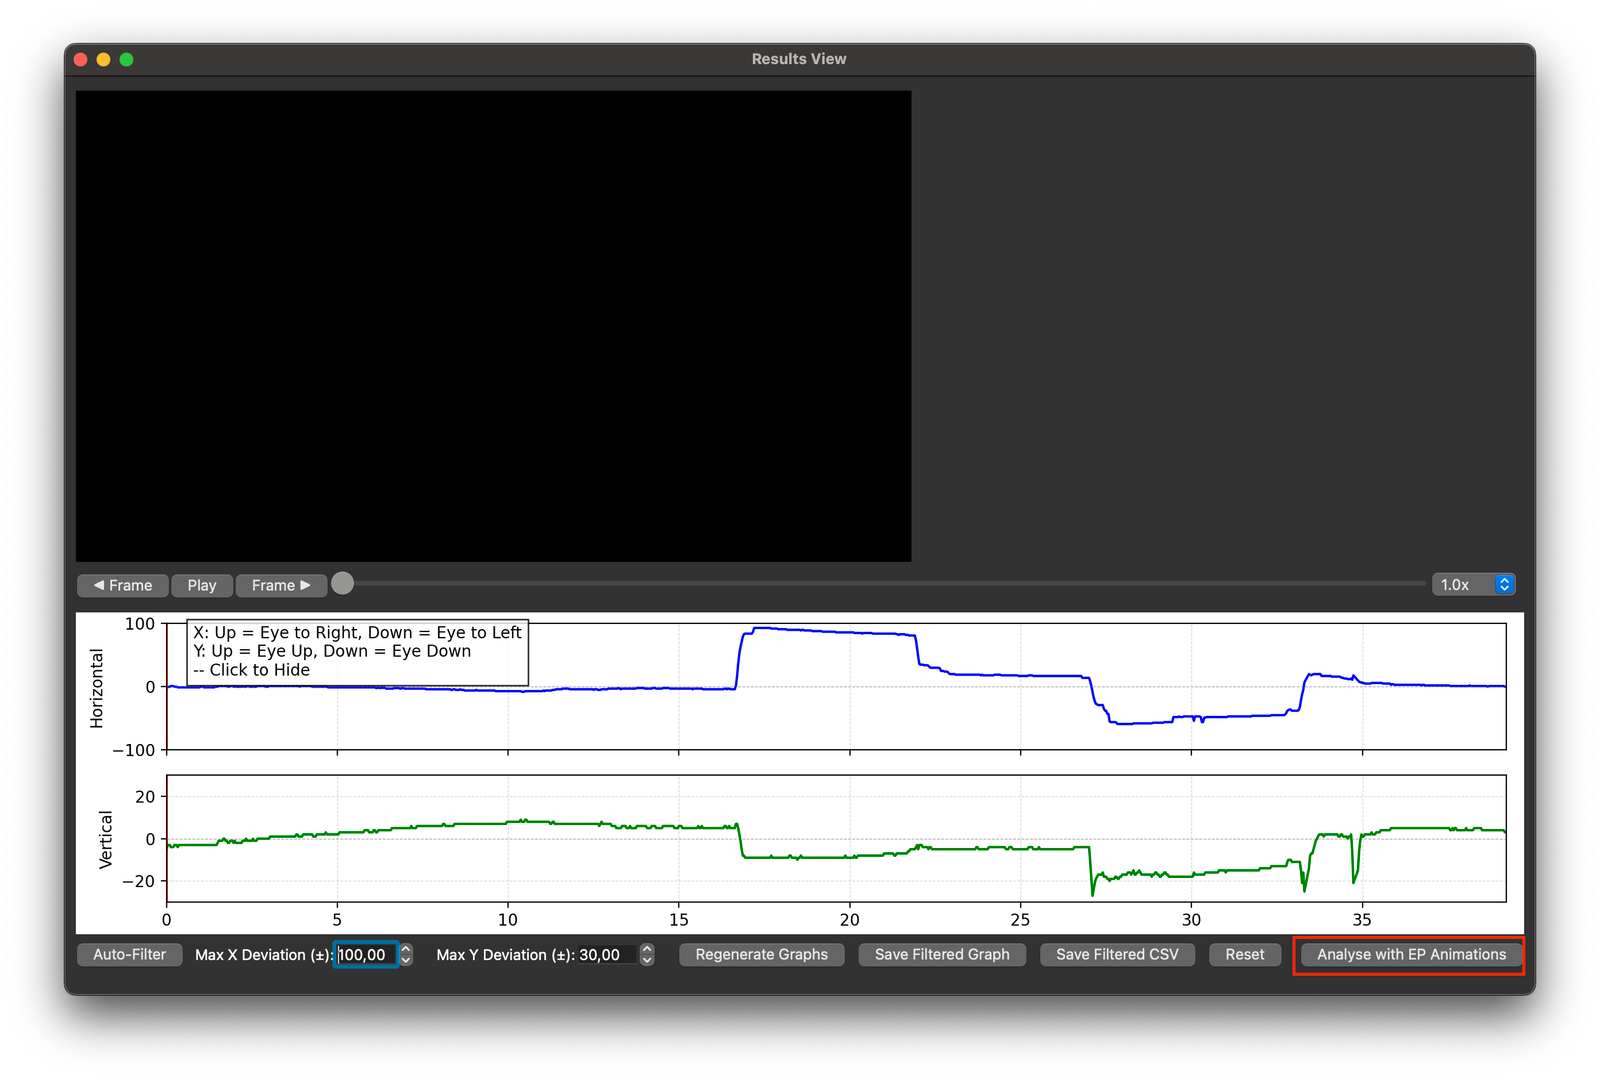
Please be patient after clicking the button, depending on your computer it may take a minute to launch EP Animations. Make sure to navigate to EP Animation, as the window won't appear on top on its own
If EP Animations is installed but the button doesn't show in your results view, make sure that you're running Eye Precision v1.4.4 or higher (displayed in the bar at the top of the window or screen). If it still doesn't show, you can manually tell Eye Precision where to find EP Animations under "Advanced Settings" in the menu bar